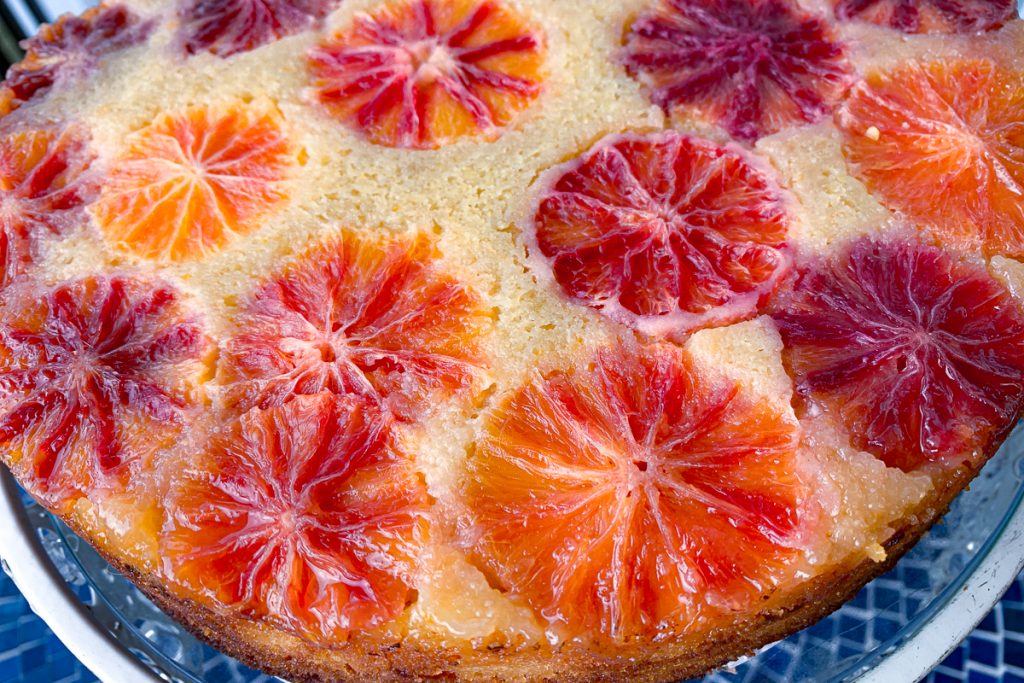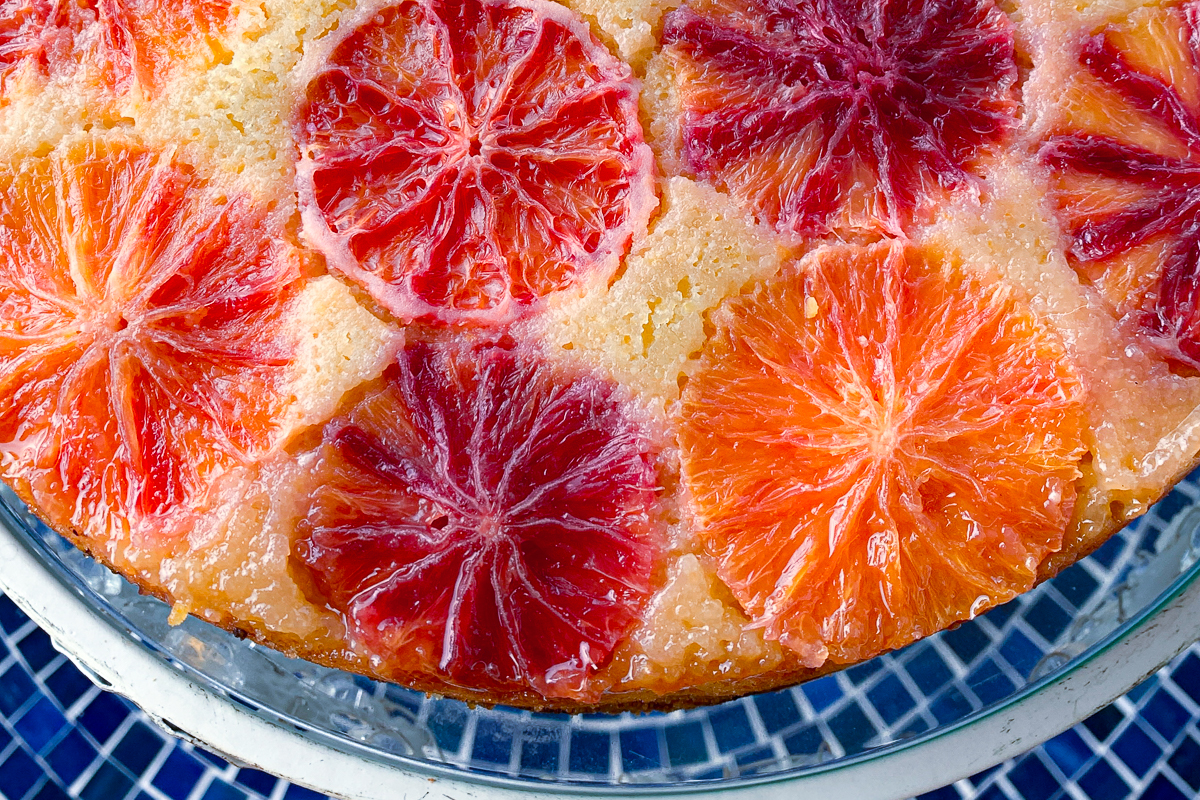
Today’s post shares my recipe for a Blood Orange Polenta cake. A delightful and special treat of the winter season. It is, if a cake can be such a thing, hearty, by way of the polenta. But it is also sweet, which comes from the ricotta cheese used in the cake. And of course it is a bit citrus-y and complex courtesy of the most visible part of the cake – the blood oranges.
January doesn’t really have much to recommend it, at least where I live. It is the coldest month of the year in New England. No far from the first day of winter, the days are still short – the sun is down below 5 PM for most of the month. The holidays are past, and the festive atmosphere is gone. So are most of the cheery lights people put out to light the dark. We are far enough from fall where all the trees are bare. We are not near enough to spring to start seeing encouraging signs of green and warmth. No — really, there isn’t much to like about January.
One of the only bright spots in January is that citrus is in season. Not just in Florida, but readily available in my local grocery stores. And I don’t only get routine navel oranges, but a wide variety. Cara Cara oranges, the red-pink sweeties. Minneolas, the cross between a mandarin and grapefruit. Tangerines. Mandarins oranges – or better yet, clementines when we get imports from Spain. Speaking of Spain, Valencia oranges are common sights too. And my personal favorites — Blood Oranges.
An Orange by Any Other Name …
The name Blood Orange is more than a bit misleading. It makes them sound sinister in some way like “blood money” or “bad blood.” But the reality is really quite different. Sure, they often have a deep red color. But they also come with a gently sweeter taste than a standard orange. While you savor one, you can also taste notes of a slight raspberry taste. Great on their own, blood oranges can be found in cocktails, salads, and of course juiced. They are a nutritious too!
I still talk about the very best glass of orange juice I ever had. It was about 20 years ago, on my first trip to Italy. I was in Milan, and a friend insisted that I join him as his local specifically for a glass of orange juice. He told me that that this orange juice would be ‘life changing’. Honestly, I was a bit skeptical someone could be so effusive about ‘just’ orange juice.
Until this point, I had never had fresh squeezed juice. And obviously, I’d never had the sort of fresh juice you find across Spain and Italy, pressed on order. But this glass of juice in Milan changed all that. It was this ruby color, not orange, so I knew I had something different. And with the first sip, I knew was hooked. It was the best juice I’d ever (and still to this day) had. It was a blood orange juice, fresh squeezed. Ever since that moment, blood oranges have been my favorite.
… Is Still For Sweets
Which brings us to the other use for blood oranges — and that is in baked goods. To begin with, the citrus is a natural flavor enhancer. It can intensify and brighten other ingredients. The orange’s flavor itself is at once sweet and bitter, offering a complexity. And of course, the color adds a dramatic flair.
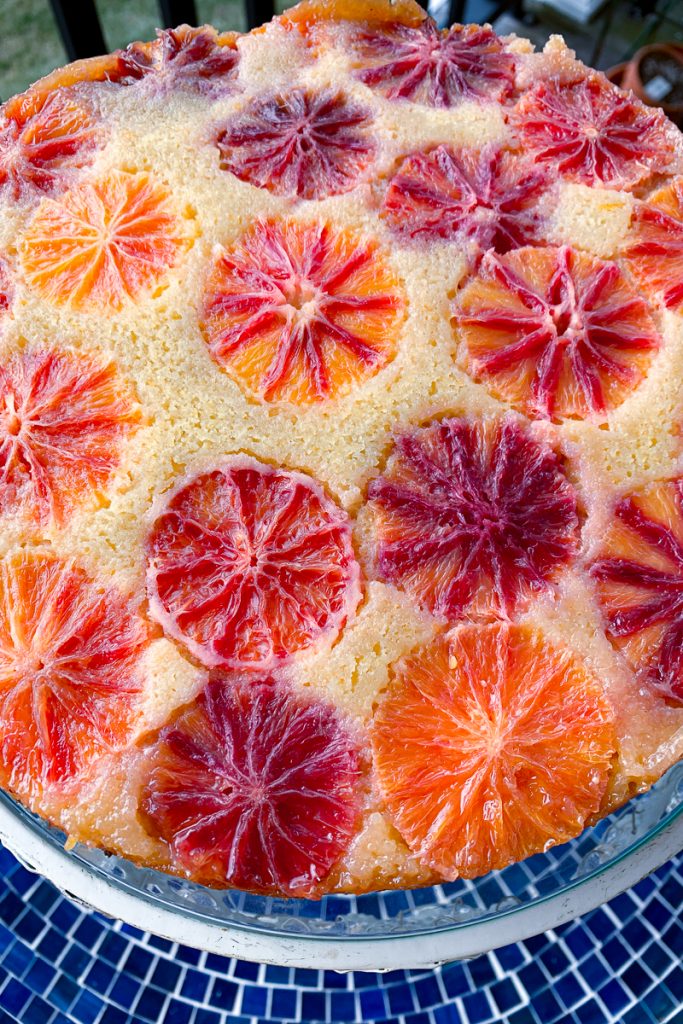
For all these reasons, I think they are the perfect fruit for the Blood Orange Polenta Cake. Unlike these biscotti, where the orange is an accent, here, the oranges will be the star. The flavor and the look both highlight the bright flavor of oranges, and their role in sweet things!
Picking the Pan
I’ve written my recipe using a 9 inch springform pan, but that is mostly because I have one (actually, the Elegant Baker has one, I’m just borrowing it). A springform pan isn’t absolutely necessary. It does make the job of taking the cake out of the pan easier, but the springform isn’t essential. If you have one, I say use it. If you don’t – that’s OK too. Just follow the recipe except where it says “remove the sides”.
What I would say is essential though, is a pan with straight sides. That is, not flared or tapered, and the circle at the top of the pan is the same size as the base of the pan. For example, a pie dish has steep tapers and would not really work for this cake.
Prepare the Pan
Regardless of if you use a springform pan or not, there are few steps that help ensure the Blood Orange Polenta Cake comes out easily. Part of the joy of an upside-down cake is the visual element that is the “top” of the presented cake. You don’t want that to get ruined when taking the cake from the pan.
The trick is a combination of parchment paper and cooking spray. The bottom layer of the cake will be a syrup with the fruit in it. That means it will tend to be a bit sticky so you’ll work around that. First, use the bottom of your pan to trace a circle on a piece of parchment paper. Use scissors to cut the circle out. Since you trace the outside of your pan, you should cut just inside the trace line of your circle to fit the inside of the pan.
Next, cut a long strip of parchment paper to be about 1.5 – 3 cm wider than your pan is tall. My pan is 8 cm tall, so I cut my parchment strip 11 CM. This will be a ring of parchment for along the inside walls of the pan.
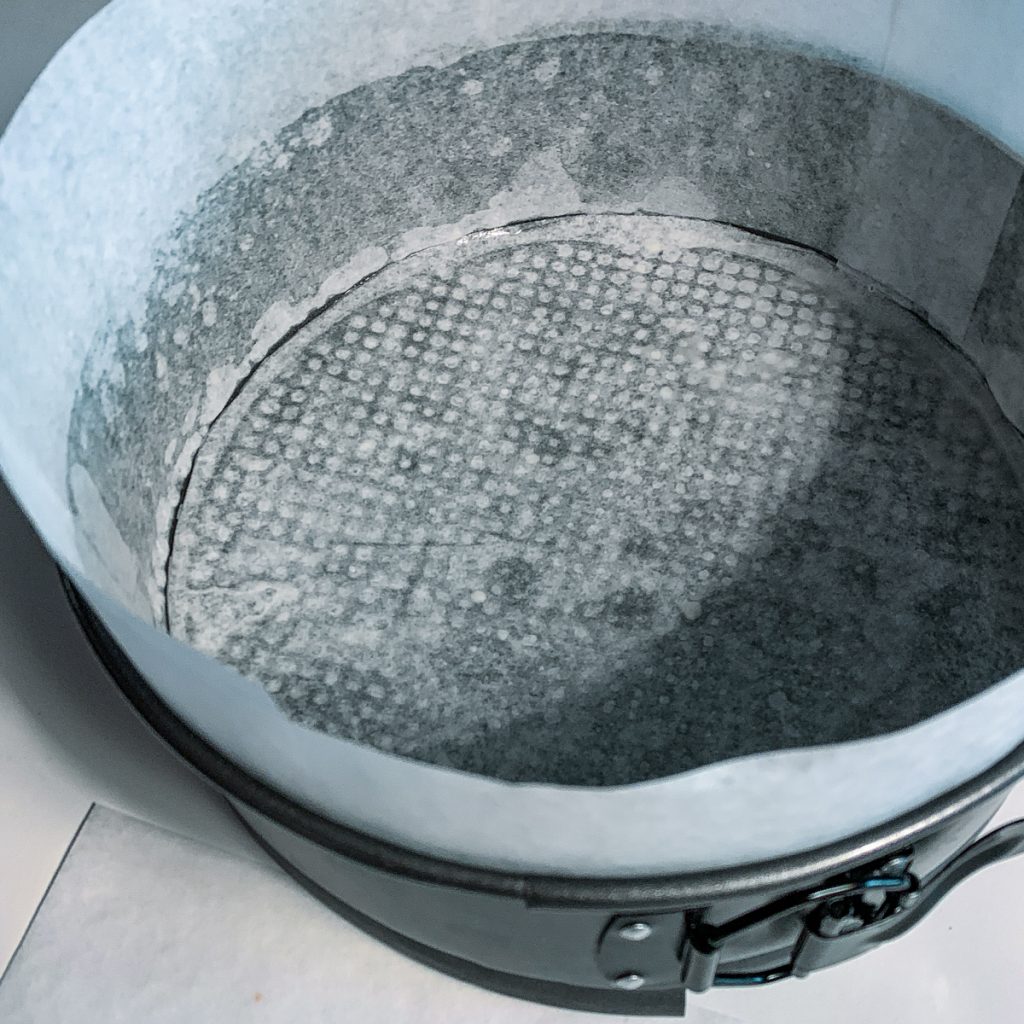
Once you have both pieces of parchment cut, lightly spray the pan with cooking spray. Put the round in the bottom of the pan, then put the strip along the inside wall of the pan. The cooking spray should allow both to stick a bit without moving. Now give a second light spray to the parchment paper in the pan.
Prepare the Oranges
The visual stars for the Blood Orange Polenta Cake are, unsurprisingly, the blood oranges. Placed in the bottom of the pan before adding batter, they end up as the top of the cake in the end. The oranges also take the lead in bringing flavor to the dessert.
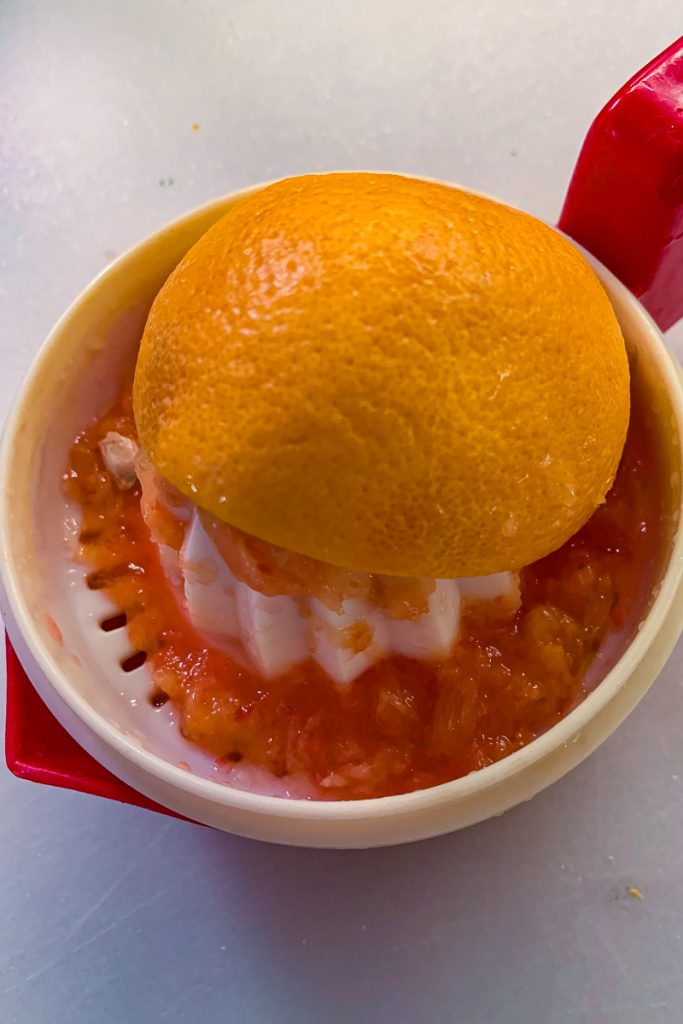
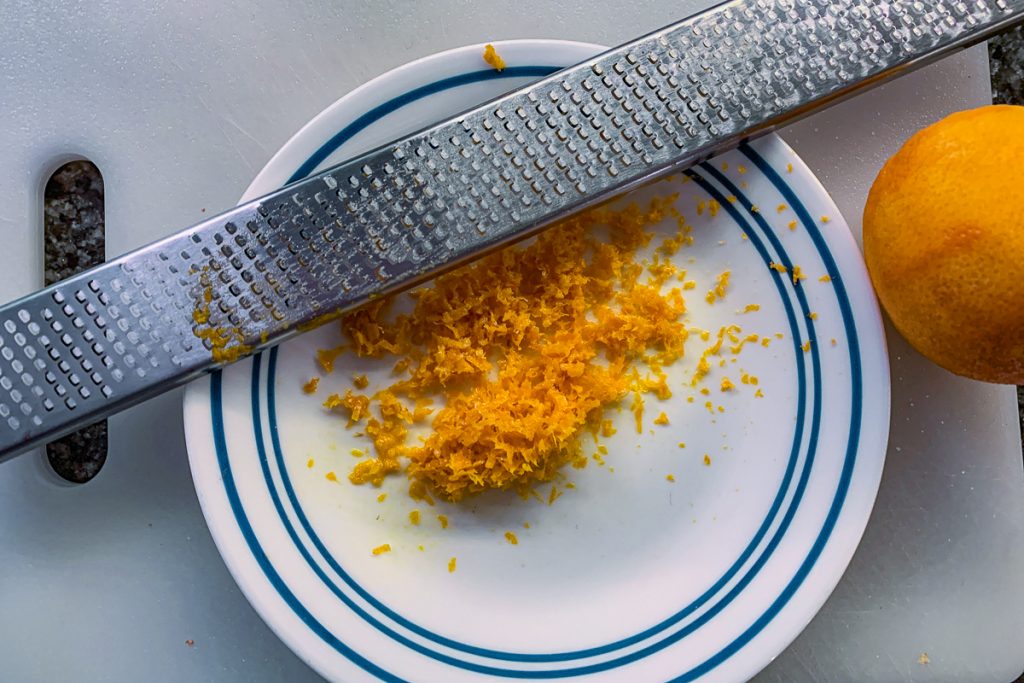
How to ensure that you get the visual pop that you are looking for with the oranges? And how to get that orangey tang throughout the cake? You need three parts of the orange — the slices, the zest, and (from one of them) the juice. What you don’t really need is the peel of the orange. There is a ‘best’ order to go through harvesting all three parts that you need, and discarding what you don’t.
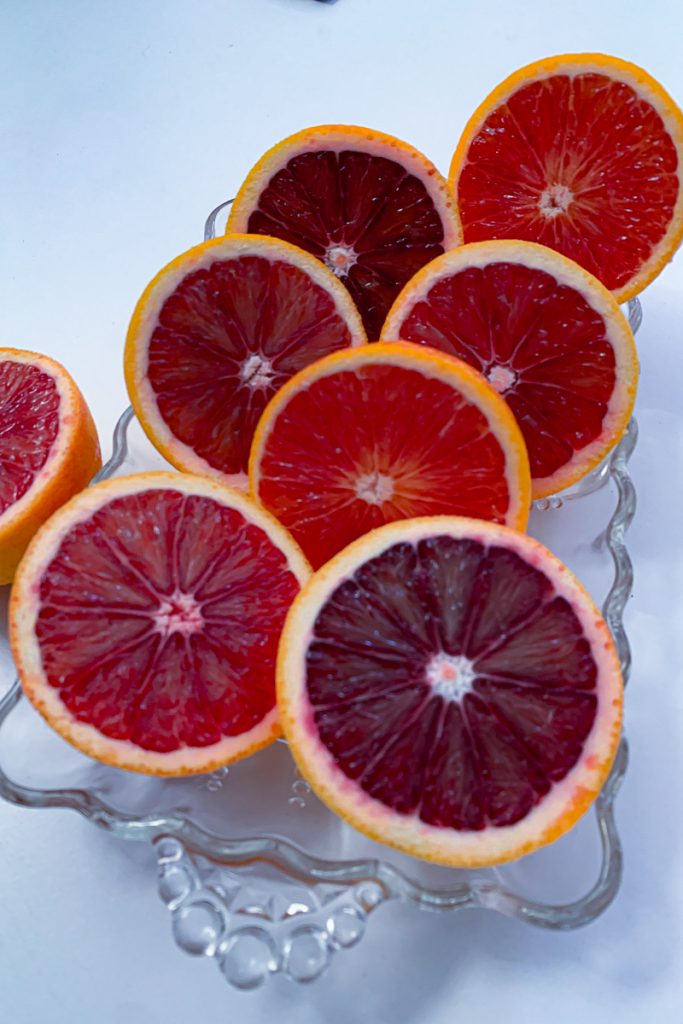
The first thing to do is to zest your oranges with a microplane. Always easiest to do on a ‘whole’ fruit, now is the time to grab that zest. So zest your oranges and set it aside until you need it in a few minutes. Now, slice three oranges into rings about 1/2 inch thick.
These will be your ‘show’ decorative elements of the cake. They are also known as the bottom layer when assembling. But you don’t really need the peels, and in fact the thick white part of the peel tends to be bitter. That can change the flavor of the cake, so they have to go.
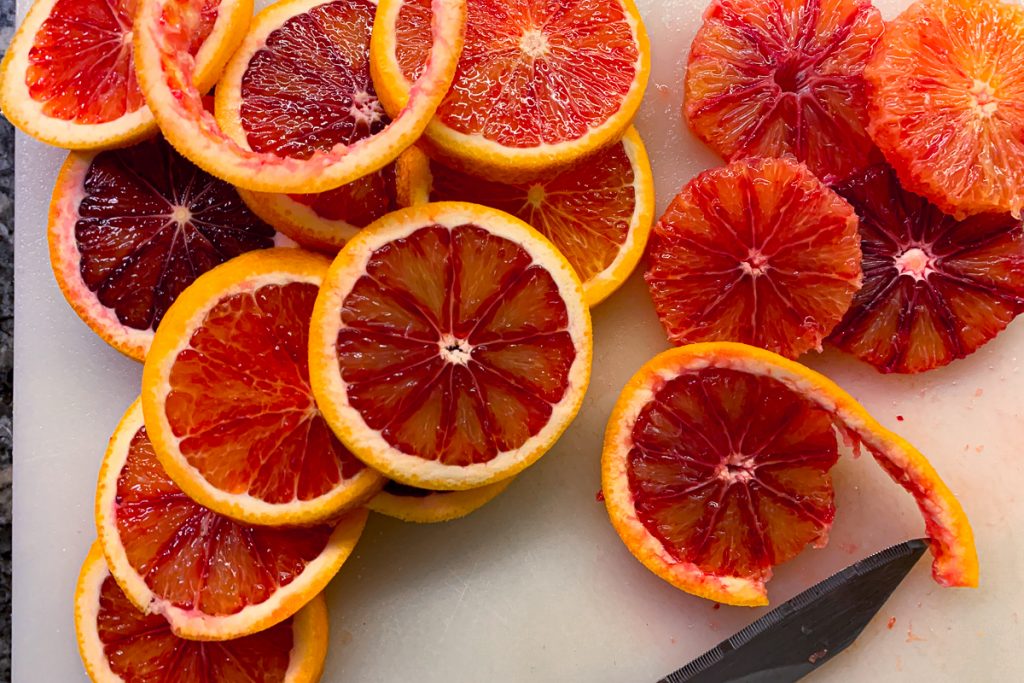
Lay each slice on a cutting board and using a paring knife, carefully cut away the peel, leaving just a ring of bright colored orange wedges. Repeat for each of the orange rings, and set these aside until you are ready to assemble the cake.
Make the batter
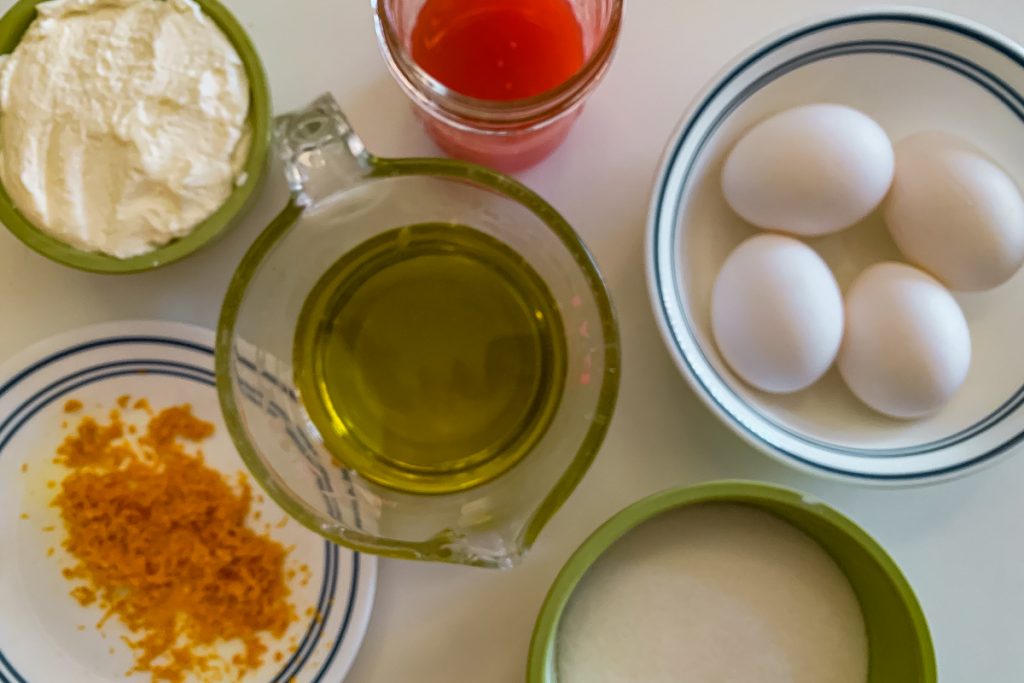
Making the batter is a pretty straightforward exercise. Mix the drys together and set aside while you get started on the wets. In a stand mixer, beat together the oil and sugar until light and fluffy. I use oil here as a fat because it is ‘lighter’ than butter. And since I am using ricotta as well, I didn’t think it necessary to use the heavier butter.
Once the butter and oil are combined, add the eggs one at a time. Then the juice and zest you set aside from earlier. It will be a very loose, liquidy mixture. This is OK because not only are you adding ricotta, you’ll also be adding the polenta.

Polenta not only absorbs lots of liquid, it really needs it to bring out its flavor. If you were just making a creamy polenta to go with dinner, you would used four to five times the liquid you used of polenta. So you need a very liquid base to add the dry ingredients, including the polenta to.
I alternate adding portions of the dry ingredients and the ricotta to the wets. This keeps the ingredients in a sort of balance. That in turn, helps prevent dry spots, or pockets of unblended ricotta. Perhaps it isn’t totally necessary, but I don’t think it hurts to take the extra step.
Putting It Altogether
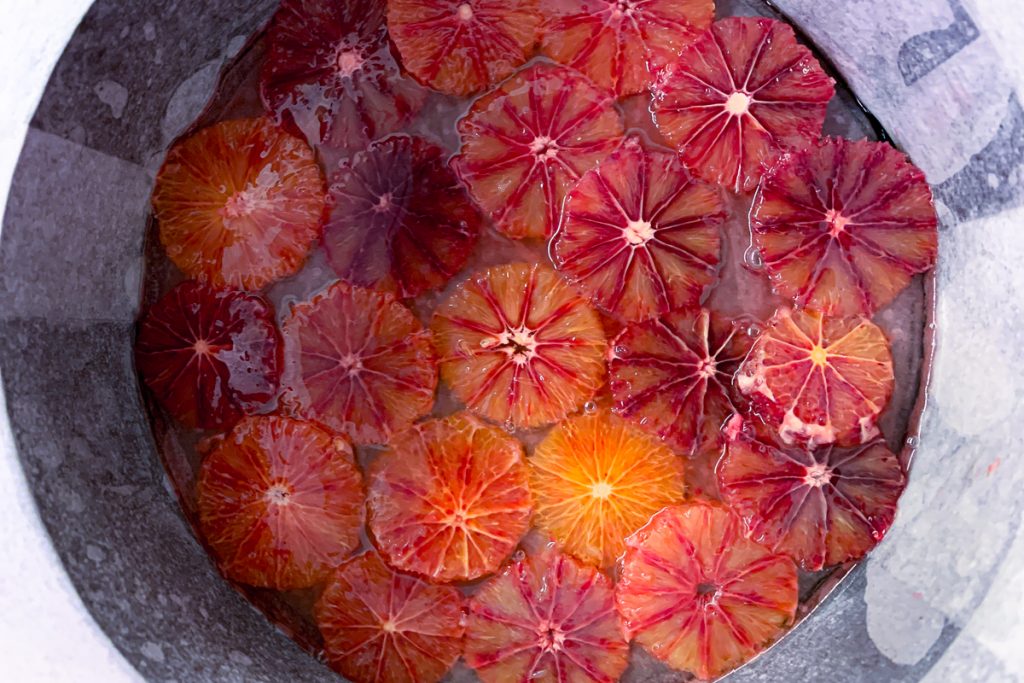
Once the batter is made, it is time to put it all together. We start with the oranges. Ultimately, they will be the top of your cake, but since it’s and ‘upside-down cake’ we put them in the pan first. To help give them a nice and bright gloss, the oranges sit in a simple syrup at the bottom of the pan.

Before Microwaving 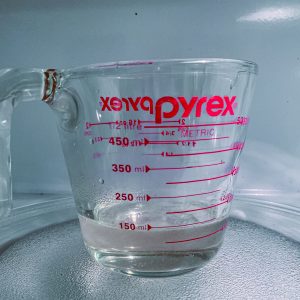
After
Start by creating the syrup with some water and sugar in a microwavable measuring cup. Microwave on high for 30 seconds, then whisk until all the sugar is dissolved. If you have to take a second round in the microwave, that’s OK. Once the syrup is made, pour half of it into the bottom of your prepared pan. This is what the oranges will sit in.
Next, arrange the oranges , slightly overlapping, until the bottom of the pan is covered. Alternate slice sizes, shades, or even varieties if you are using something like a cara cara orange as well. When all the oranges are in place, pour the rest of the sugar syrup over them. And steely spread around
Time to add the batter. Take some care so as not to upset the oranges you just carefully arranged. I find spooning the batter in helps. Normally, I would just pour it in the pan, and let it flow around. I’m afraid this will move the orange slices, so I don’t do that. Instead, I spoon it in by scoopfuls and gently cover all the oranges. Once they are covered, you can slowly pour the rest of the batter into the pan.
Banking and Cooling
Bake the cake at 350F/180C for about 35 – 40 minutes. Timing here is a bit more imprecise than usual because of that orange topping layer. Because that layer is ‘wet’, the cake will take longer than a typical 1 layer cake. You may even notice that the juices bubble up the sides. That is OK because it creates a nice caramelized edge. So keep an eye on your cake, and start checking about about 30 minutes.
The cake is done like all cakes — when a toothpick comes out clean. You’ll ansi want too see the middle spring back when gently pushed with the forefinger. Remove from the oven and let sit for 15 minutes before taking out of the pan.
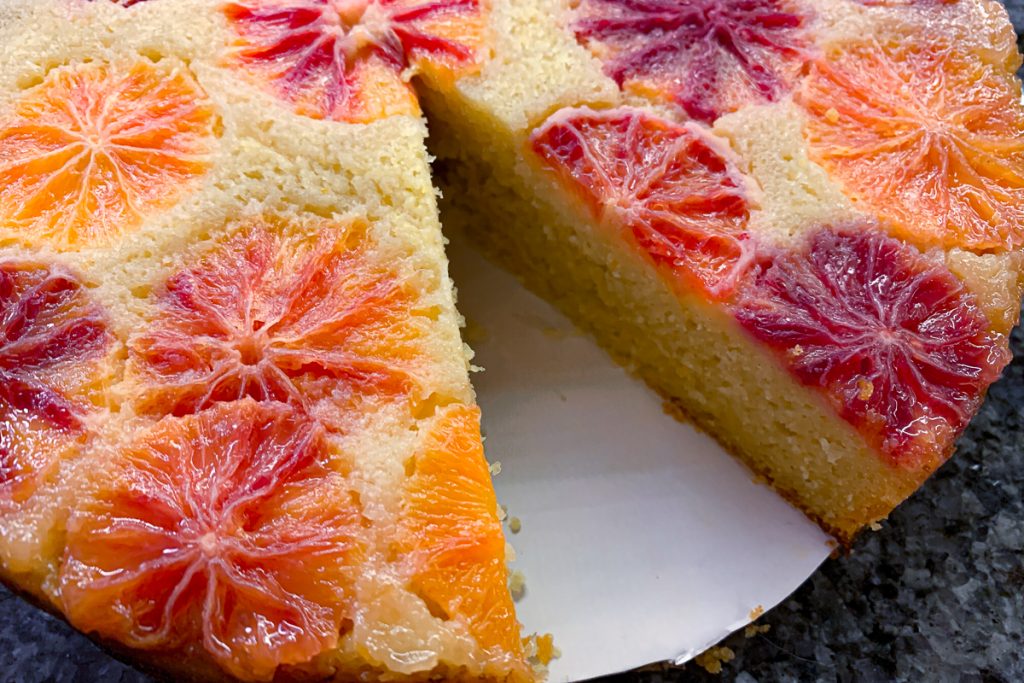
To remove cake from the pan, loosen the side of the pan and gently remove the sides. Carefully pull away the parchment ring around the cake. Place a serving plate or cake stand over the cake pan and carefully flip the cake in a smooth, quick motion. Allow the cake to cool for another 15 minutes.
So there you have it. One of the prettiest, cheeriest cakes you can make to help stave of the January ‘blahs.’ If it wasn’t for oranges, January wouldn’t have very much going for it. But there are oranges – and you know the old saying. When life gives you oranges, make Blood Orange Polenta Cake!